iNiLabs School Android App - Ionic Mobile Application
- Getting Started
- Pre-Requisites
- Installation
- Android
- How to contact us?
Getting Started
- Created: 17/02/2020
- Version: 1.0
- Author: iNiLabs ( inilabs.net )
- Support: Online Help line Desk ( support.inilabs.net )
- Find us on Facebook
Pre-Requisites
- System requirements
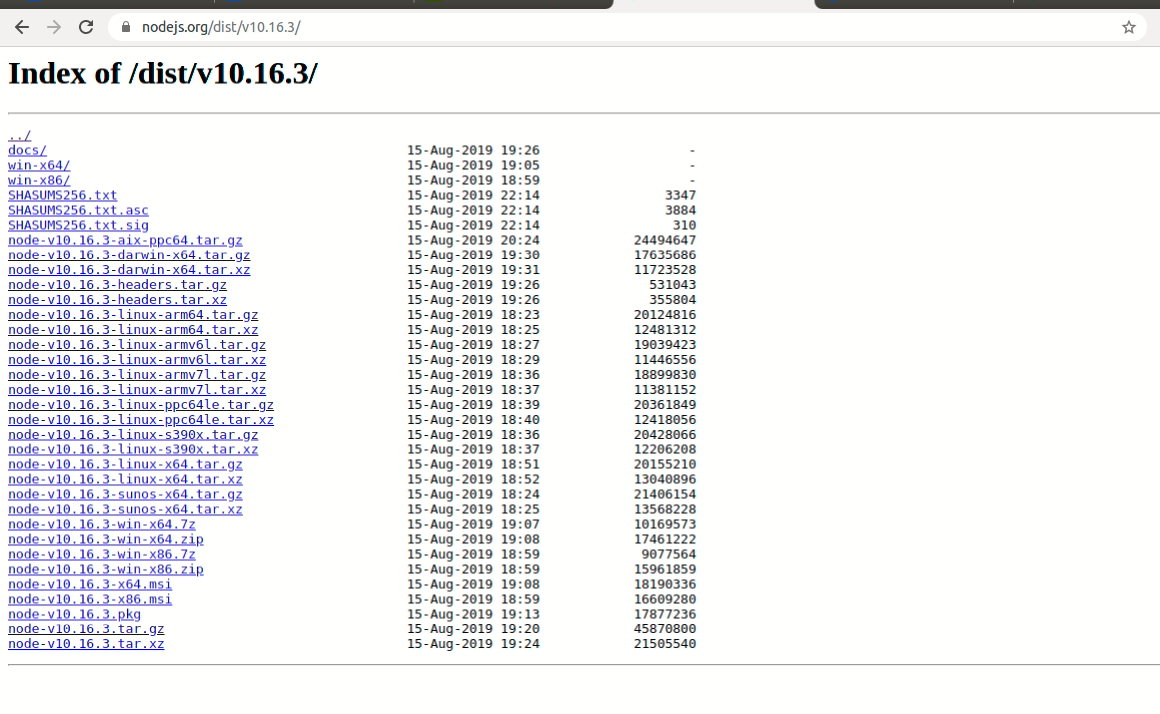
- Node version: v10.16.3
- Ionic CLI Version: 4.10.3
- Cordova CLI Version: 8.1.2
- Cordova Platform Version: android 8.0.0
- Android Studio with SDK Manager.
- You need Google Chrome for website usage
- You must obtain a server for hosting and purchase domain name which is used in URLs to identify particular web pages and make the most sense for your business
You should have a laptop or personal computer for the installation of tools and to deploy application for the website, android phone. You can use Command Prompt, but Visual Studio Code & Webstrom Code is recommended.
Installation with tools
You need to install following tools
- Download & install Node.js(10.16.3)
https://nodejs.org/dist/v10.16.3/You can download Node.js according to your operating system requirement.
- Download Visual studio Code or Webstorm which is recommended. Below here is the link for download. https://code.visualstudio.com/download https://www.jetbrains.com/webstorm/download/
- Download Android Studio from provided link.
Installation Ionic Setup
After inilabs school management system web app installation and setup, please follow below mentioned instructions to set up your mobile application.
After installing Node and NPM setup, lets install the ionic and Cordova CLI
- Open CMD or terminal and install Ionic and Cordova using the following commands (Make sure you run these command as a admin)
- below mentioned command is for ionic installation
- now install cordova using the below given command
Application is built and tested using the
- Node Version: v10.16.3
- Ionic CLI Version: 4.10.3
- Cordova CLI: 8.1.2
- Ioic Framwork Version: v3
Once you are done with the installation, prepare your project.
Now we have to load project folder (or cd to your project folder) in our CMD or terminal.
Ionic App icon & splash screen Setup
Generate perfectly sized icons and splash screens from PNG source images
The source image for icons should ideally be at least 1024×1024px and located at resources/icon.png. The source image for splash screens should ideally be at least 2732×2732px and located at resources/splash.png. If you used ionic start, there should already be default Ionic resources in the resources/ directory, which you can overwrit
Inside the folder you will find all the ionic application code.
Now open project folder/resources/icon.png &splash.png overwrit file and change the following.
![]()
Now we have to load project folder (or cd to your project folder) in our CMD or terminal.
Ionic Source Code Setup
Now we have setup the ionic environment. We need to connect our app to the admin panel. open the folder name(App Source Code) inside the downloaded packages.
Inside the folder you will find all the ionic application code.
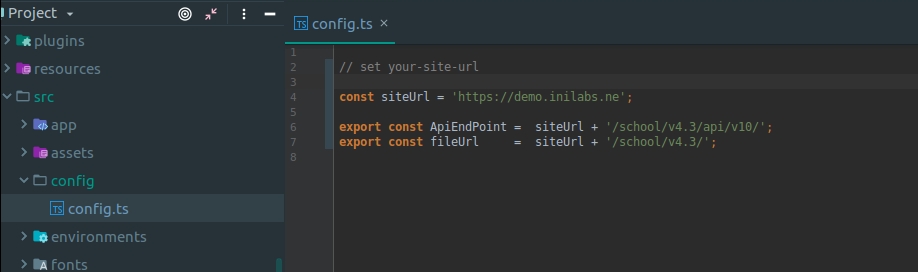
Now open project folder/src/config/configs.ts file and change the following.
- http://your-site-url (it will be the url of your domain)
Android
Build Android App For Testing On Windows
Install Java Development Kit(JDK)
- Download & install Java Development kit(JDK) latest
https://www.oracle.com/technetwork/java/javase/downloads/jdk8-downloads-2133151.html
-
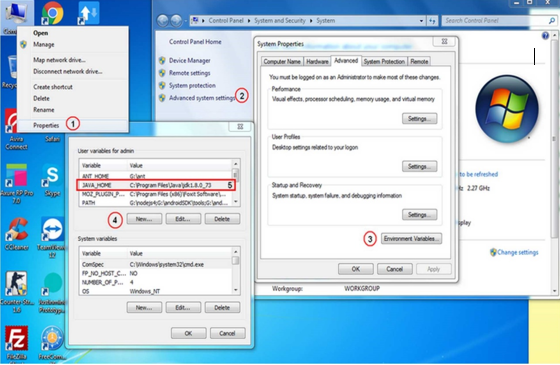
Set JAVA_HOME environment variable to the location of your JDK installation.
and examplehttps://www.baeldung.com/java-home-on-windows-7-8-10-mac-os-x-linux
-
In File Explorer right click on the Computer Icon, then click Properties> Advanced System Settings> Environmental Variables.
Android Studio And Android SDK
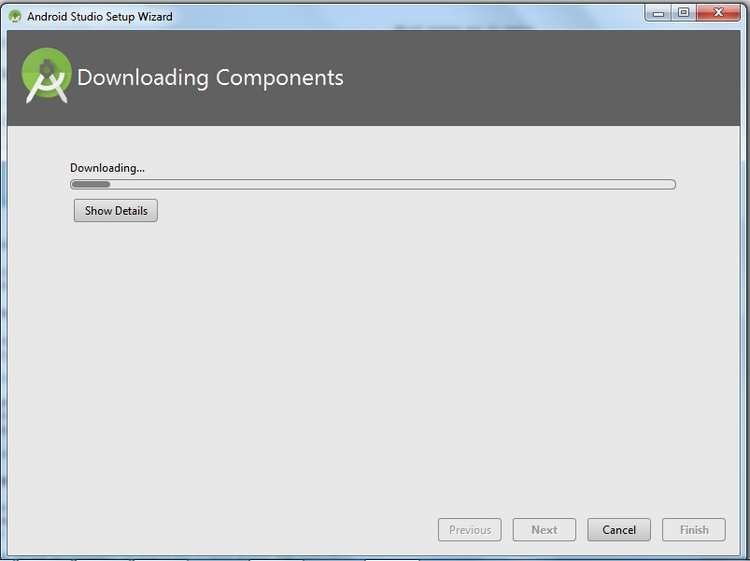
- Download and install Android Studio
https://developer.android.com/studio/install.html?pkg=studio
-
Open Android Studio, click Next to download all Packages for Android SDK
Setting Environment Variable for Android SDK
- In File Explorer right click on My computer Icon. Then click Properties> Advanced System Settings> Environment variable.
- In File Explorer right-click on the This PC (or Computer) icon, then click Properties -> Advanced System Settings -> Environmental Variables.

-
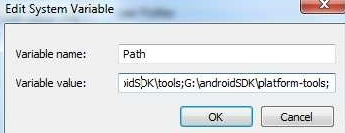
Select the PATH variable and press Edit. Add more path to android-sdk\tools and android-sdk\platform-tools to PATH, example:
Add Platform & Build to APK
Move to the myPROJECT folder in the terminal, run the following command
Now open project folder/Platforms/android/app/build/outputs/debug/app-debug-apk in the testing apk.

Android App Deploy To Play Store & publish
Android development environment setup
Requirements
- Java SDK
- Android Studio
- Updated Android SDK tools, platform and component dependencies. Available through Android Studio’s SDK Manager
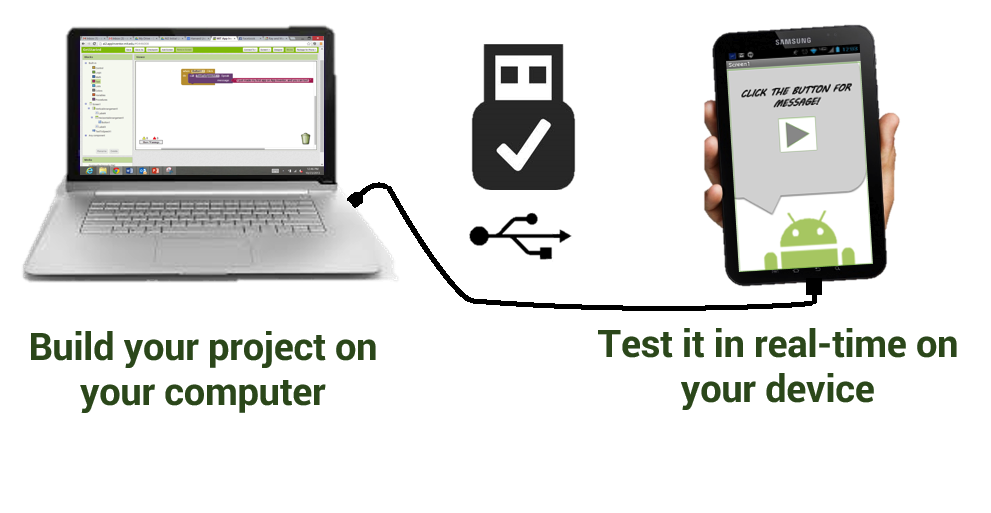
Running Your App
To run your app, all you have to do is enable USB debugging and Developer Mode on your Android device, then run
myPROJECT folder in the terminal, run the following command
This will produce a debug build of your app, both in terms of Android and Ionic’s code
Enabling USB debugging and Developer Mode can vary between devices, but is easy to look up with a Google search. You can also check out Enabling On-device Developer Options in the Android docs.
Production Builds & Release apk
Please follow below link to upload your app to store https://ionicframework.com/docs/v1/guide/publishing.html
To run or build your app for production, run
This will generate a release build based on the settings in the config.xml in the platforms/android/app/build/outputs/apk directory of an app. An Ionic app will have preset default values in this file but this can be changed to customize builds.
This will minify your app’s code as Ionic’s source and also remove any debugging capabilities from the APK. This is generally used when deploying an app to the Google Play Store.
Signing an APK
If you want to release your app in the Google Play Store, you have to sign your APK file. To do this, you have to create a new certificate/keystore.
First, the unsigned APK must be signed. If a signing key has already been generated, skip these steps and use that one instead. Generate a private key using the keytool command that comes with the Android SDK:
You’ll first be prompted to create a password for the keystore. Then, answer the rest of the nice tools’ questions and when it’s all done, you should have a file called my-release-key.jks created in the current directory.
To sign the unsigned APK, run the jarsigner tool which is also included in the Android SDK:
Finally, the zip align tool must be ran to optimize the APK. The zipalign tool can be found in /path/to/Android/sdk/build-tools/VERSION/zipalign. For example, on macOS with Android Studio installed, zipalign is in ~/Library/Android/sdk/build-tools/VERSION/zipalign:
This generates a final release binary called HelloWorld.apk that can be accepted into the Google Play Store.
Submitting an app to the Google Play Store
Now that we have our release APK ready for the Google Play Store, we can create a Play Store listing and upload our APK.
To start, visit the Google Play Store Developer Console and create a new developer account.
Once you have a developer account, you can go ahead and click “Publish an Android App on Google Play”
Be sure to fill out the description for the app along with providing screenshots and additional info. When ready, upload the signed release APK that was generated and publish the app.
How To Contact Us?