Documentation
QuickPass: Visitor Gate Pass System App With Admin & Website
Thank you so much for purchasing our item from codecanyon.
- Version: 5.7
- Author: iNiLabs
- Created: 19 October, 2022
- Update: 24 October 2024
If you have any questions that are beyond the scope of this help file, Please feel free to email via Item Support Page.
What is this?
iNiLabs - Visitor Pass Management System is a system for all kind of company or business organizations. Sms gateway available (Twilio sms gateway), users can register visitors, pre-register visitors, log visitor's check-in and check-out, employee's and many more..
Features
Visitor Management is one of the very important aspects of security management. It helps in capturing the details about the visitors in a systematic manner and maintains a repository of the same. Visitor Management is a process of allowing visitors to enter the premises based on appointment, creation of identification badges and managing the Security staff deployment for effective control over the security.
- Ease of Use.
- Smart visitor service with pre-registered, pre-visitor or can be
- registered quickly, check-in, visitors are made to feel expected and welcome.
- QR codes are used for identification and check-in  purposes..
- Attractive Dashboad Report with (Employees,Visitors,pre-register visitors Details etc)
- Add User with differnt types information espically roles
- Employee full details with Visitors and pre-register Details
- Visitor's Dynamic Information
- Pre-Register Information
- Settings : General, Notification, Photo & Card Id,
- Email & Sms template, Email,  Front-end Settings
- WhatsApp messages Add send Visitor Information
- Notifications that Match Receivers' Preferences.
- FCM PushNotifications that Match Receivers' Preferences.
- Preregistration and Repeat Visitor Features.
- Visitor Photo Capture.
- Visitor Badge Printing.
- Legal Document eSignature Capture.
- Cloud-Based Visitor Logbook.
- Secured Data.
- Fast Processes More visitors in less time span
- Appointment scheduler A centralized web-based appointment scheduler
- Alerts Email/SMS and IP phone integration is available
Print badges
Beautiful sleek badges that create a safe and welcoming environment. Connect your printer and easily print any type of badge.
QR code
Send a QR code to a visitor when he takes an appointment and when he comes to the office he can easily check in by his QR code.
WhatsApp messaging
Here is a WhatsApp messaging system visitors and employees easily connect through this feature.
FCM Notifications
Here is a FCM Notifications system visitors and employees easily connect through this feature.
Send notifications
Send visitors and hosts a friendly text or email reminder before their visit, at check-in and at check out.
Impress visitors
Create a welcome that stands out by allowing your visitors to sign themselves in, while you focus on giving them a warm personal greeting
Visitor Management
Makes managing visitor information a breeze. Your employees have access to the information they need, making visitor management smooth and easy.
Visitor recognition
Make your visitors feel truly welcome. Your visitor's name will be displayed on the screen as they check in and the app can remember details, like how they like their drink. They are not just any visitor
Security
Alert key people when a visitor checks in or forgets to check out, or just about a specific visit. Make visitors aware of safety and confidentiality rules, keeping your facilities and data safe.
Data protection
Your data is safe with us. It is backed up daily across multiple servers, so you can have access to it even if there is a hardware issue. It is also yours to keep. You can, at any time, retrieve all your data.
Reports
Collect data and spot trends, produce reports and use surveys to gather feedback from your visitors. All this information can be used to help you improve the visitor experience.
Update Features v5.7
Updated Frontend With a Modern Design.
Laravel 10 and PHP 8.2 Version Updated.
Added Country Code Support to the System.
Installation
Before install, please make sure you have the components bellow enable on your server
PHP 8.0.2 or greater
OpenSSL PHP Extension
PDO PHP Extension
Mbstring PHP Extension
Tokenizer PHP Extension
XML PHP Extension
Ctype PHP Extension
JSON PHP Extension
BCMath PHP Extension
GD PHP Extension (or Imagick PHP Extension)
PHP Fileinfo extension
PHP Zip Archive
Rewrite Module (Apache or Nginx)
PHP.INI Requirements
open_basedir must be disabled
File and folder permissions
/bootstrap        775
/storage          775 (recursively)
1. Creating a new Database for your project.
2. Copy the project and paste it in your server public_html, html or your domain folder.
3. Run the install script path from any web browser (http://server.com/install).
- then you can see like this.
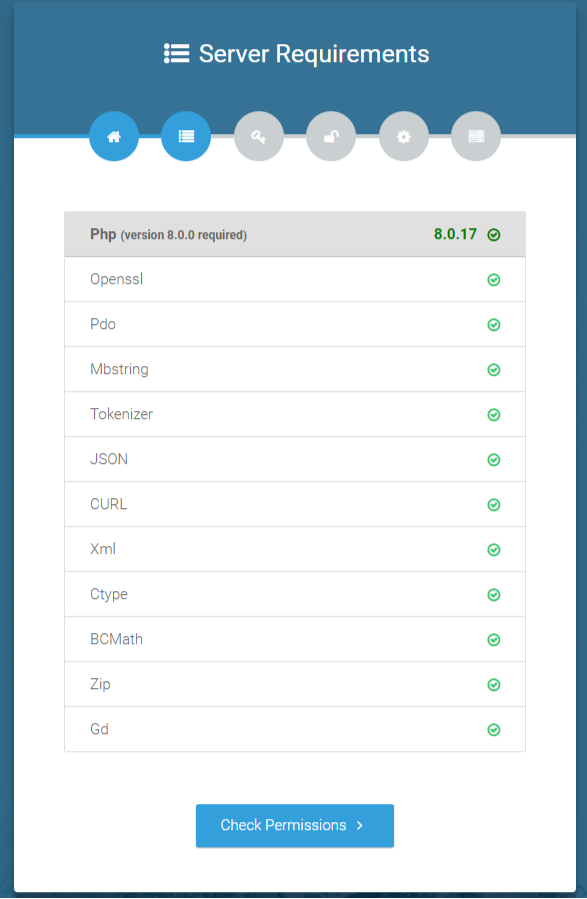
 4. Click Check Requirements.
- now you can check all PHP extension. if is not enable then enable your PHP extension
or contact your hosting provider for enable the extension.
4. Click Check Requirements.
- now you can check all PHP extension. if is not enable then enable your PHP extension
or contact your hosting provider for enable the extension.
 5. Click Check Permissions.
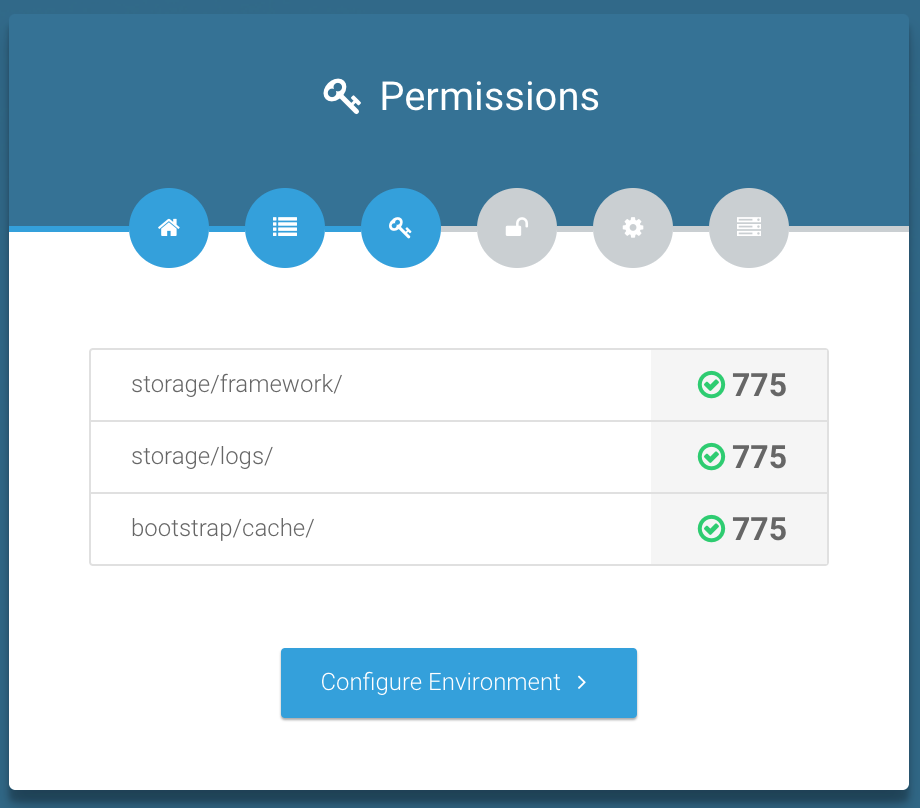
- if do not have folder permission then set permission in 775 in the folder (recursively)
- then you can see like this.
5. Click Check Permissions.
- if do not have folder permission then set permission in 775 in the folder (recursively)
- then you can see like this.
 6. Click Configure Environment.
- now you can provide Codecanyon purchase code and your username.
6. Click Configure Environment.
- now you can provide Codecanyon purchase code and your username.
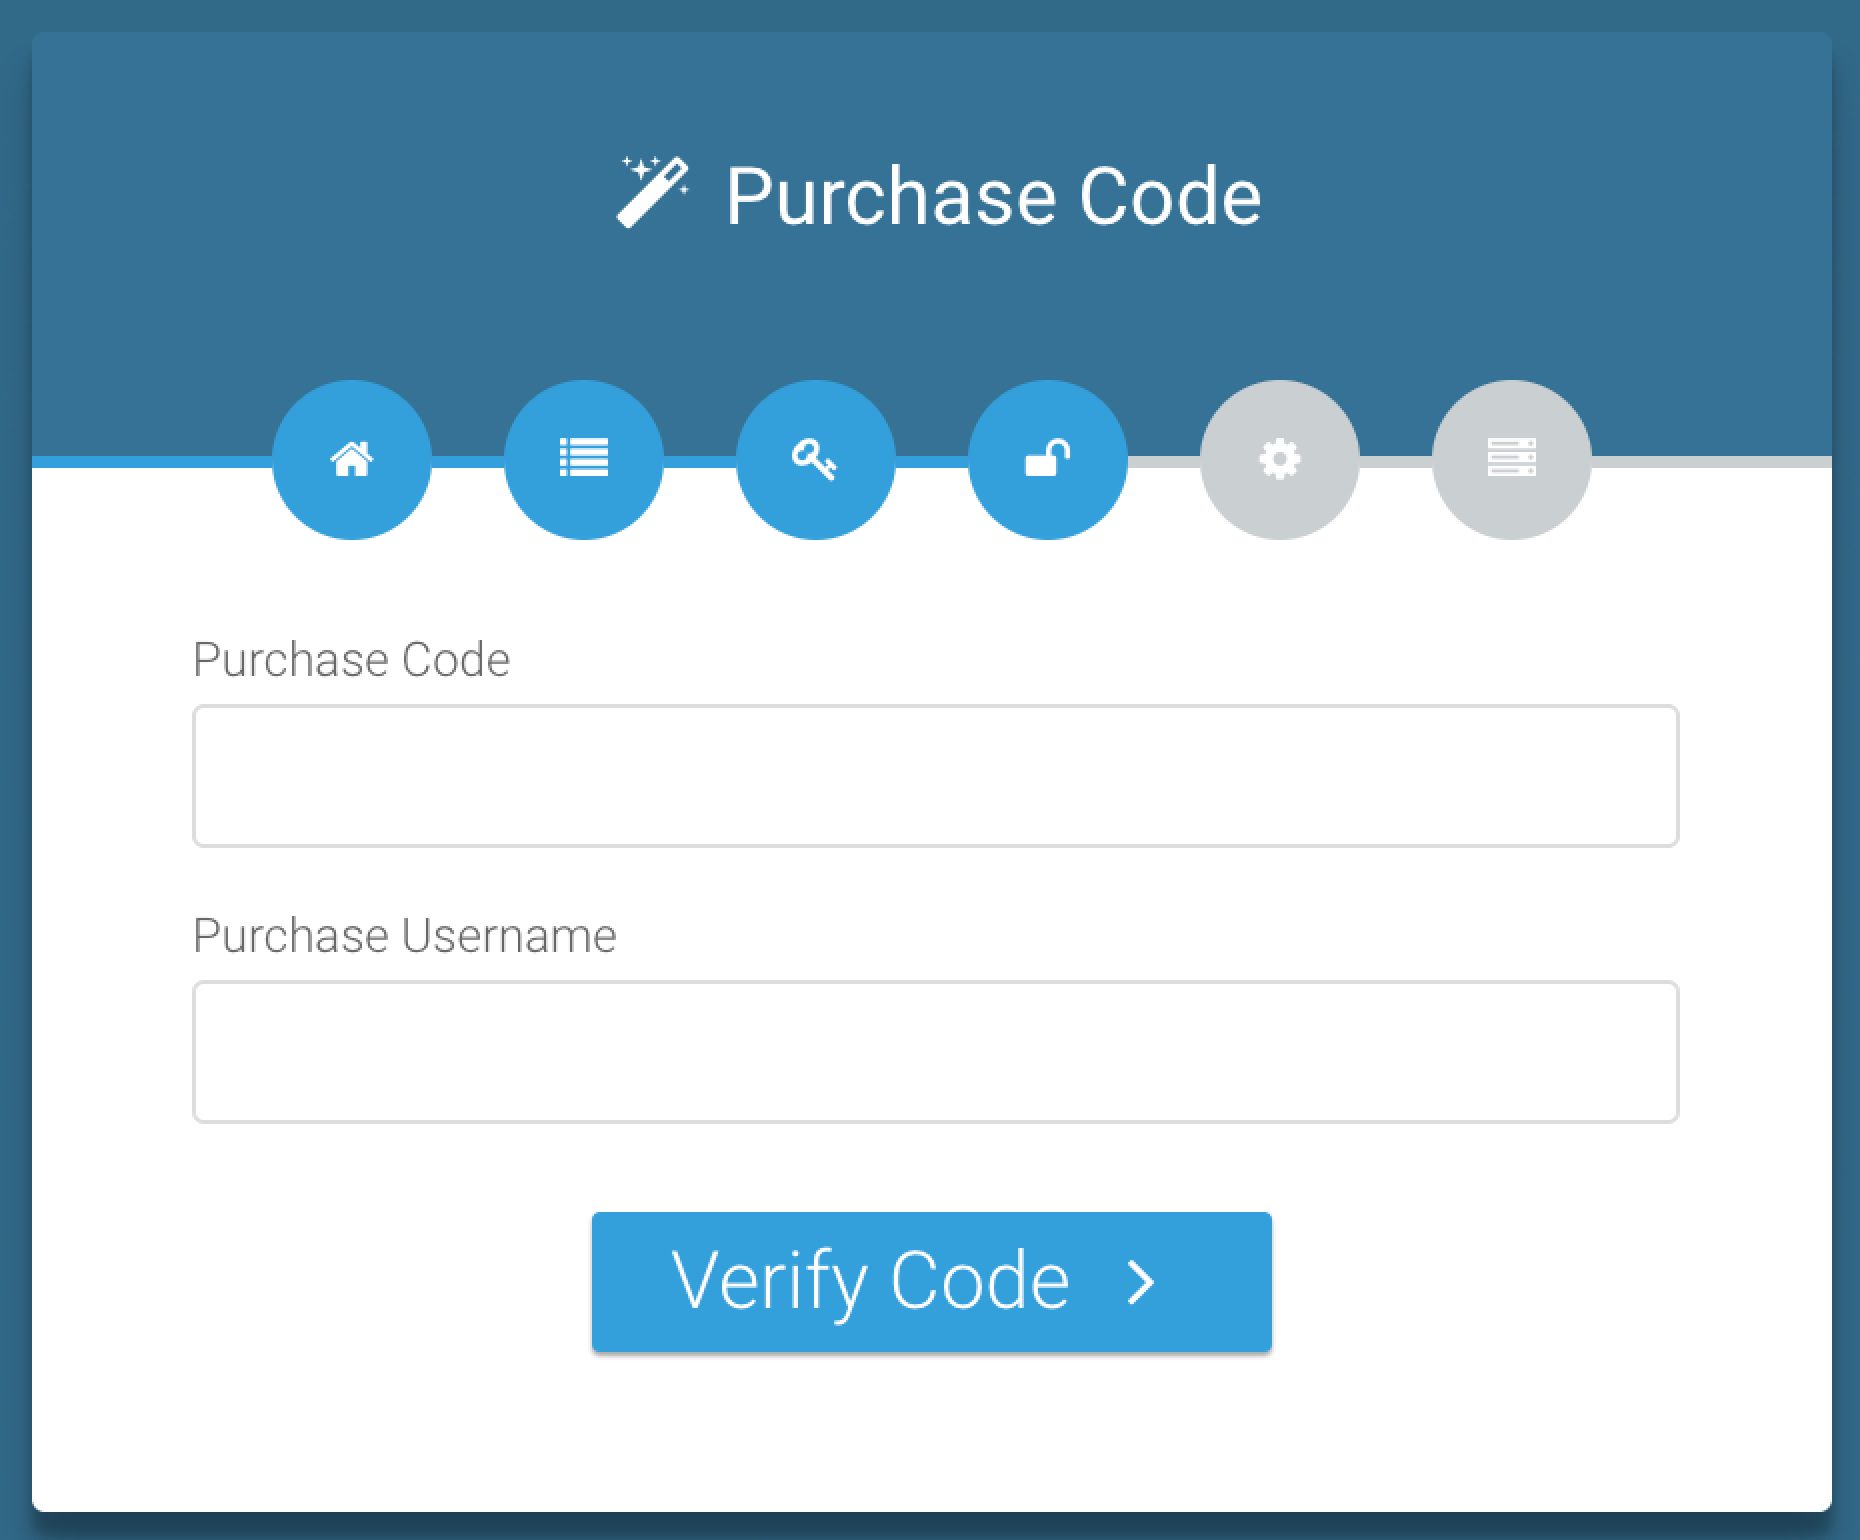 7. Click Verify Code.
- then you can see like this.
7. Click Verify Code.
- then you can see like this.
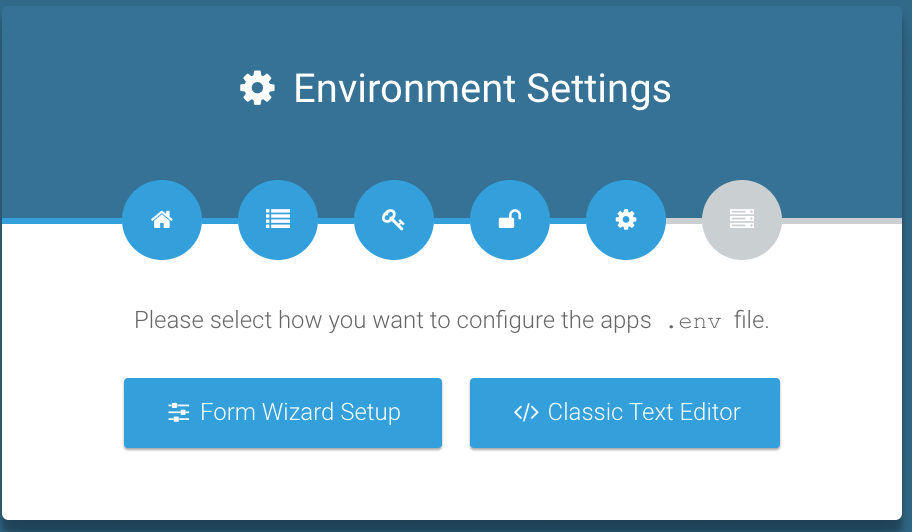
8. Now Click Form Wizard Setup.
- now provide App Name, App Debug, App Log Level & App Url.
- suggestion set 1. App Debug = false, 2. App Url is your domain like http://xyz.com
- note : do not use / in last word like this http://xyz.com/
- then you can see like this.
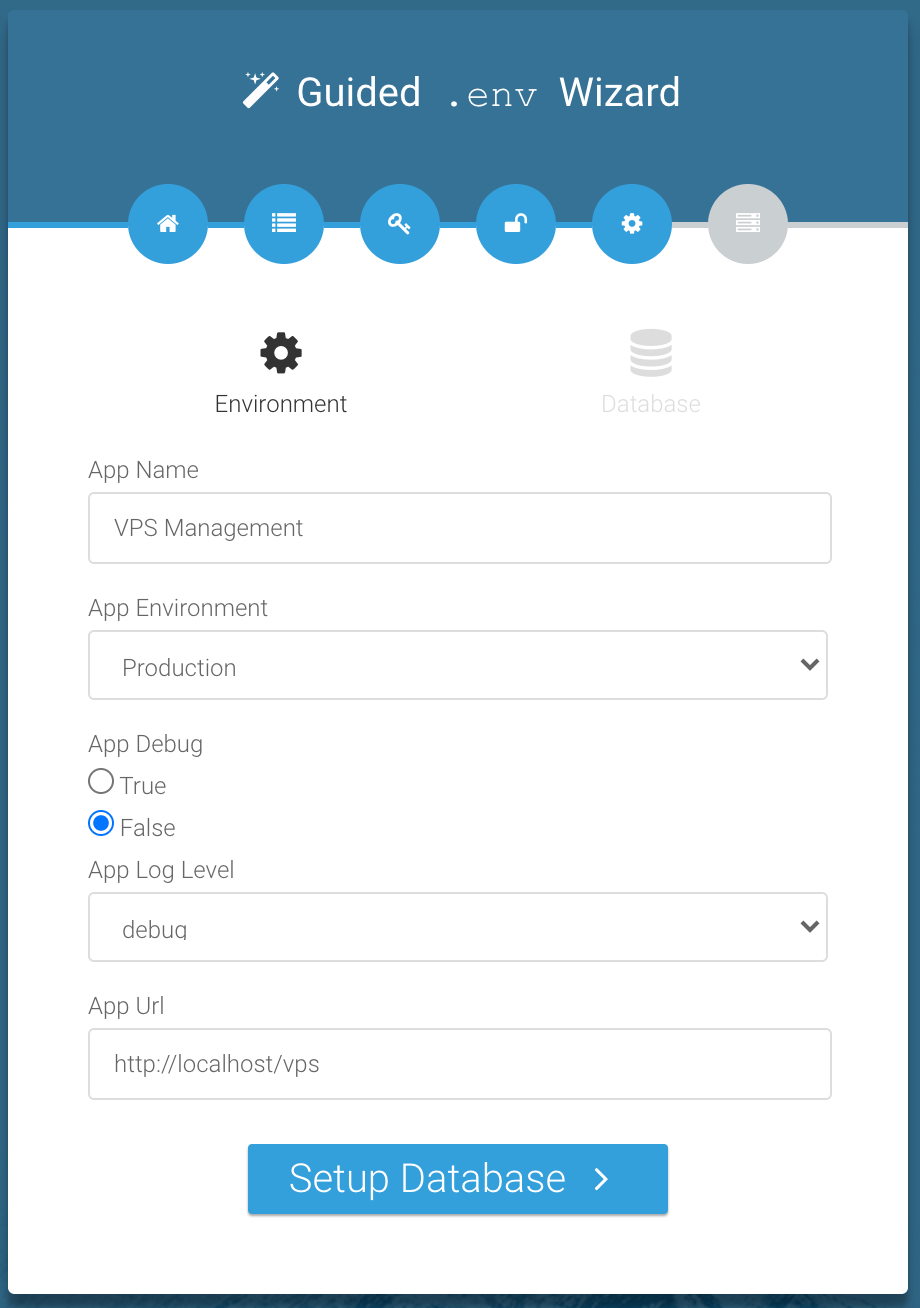 9. Click Setup Database.
- now provide Database Connection, Database Host, Database Port,
Database Name, Database User Name & Database Password.
- suggestion your default hostname is localhost so you can set Database Host = localhost
- then you can see like this.
9. Click Setup Database.
- now provide Database Connection, Database Host, Database Port,
Database Name, Database User Name & Database Password.
- suggestion your default hostname is localhost so you can set Database Host = localhost
- then you can see like this.
 10. Click Setup Application
- then you can see like this.
- so your login credits is email : admin@example.com & password is 123456
- login via this credits and change your email & password.
10. Click Setup Application
- then you can see like this.
- so your login credits is email : admin@example.com & password is 123456
- login via this credits and change your email & password.
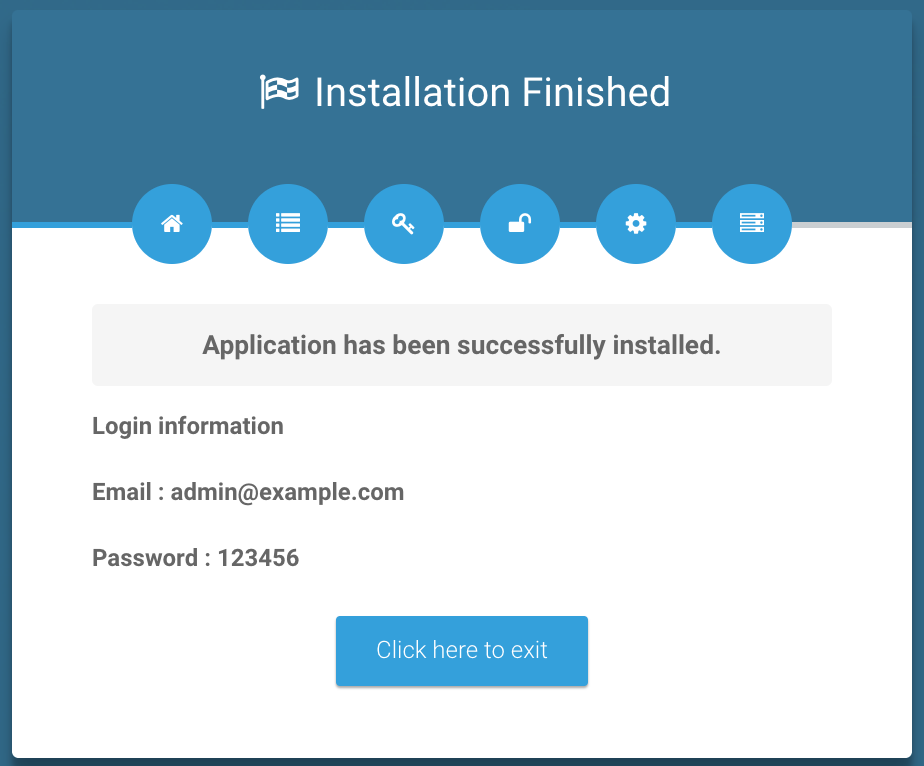 11. now you can click Click here to exit
- then you can see like this.
- installation is completed.
11. now you can click Click here to exit
- then you can see like this.
- installation is completed.

Quick Start Guide
Front-end First Page
Check in First Step

Check in Second Step

Check in Final Step

Dashboard
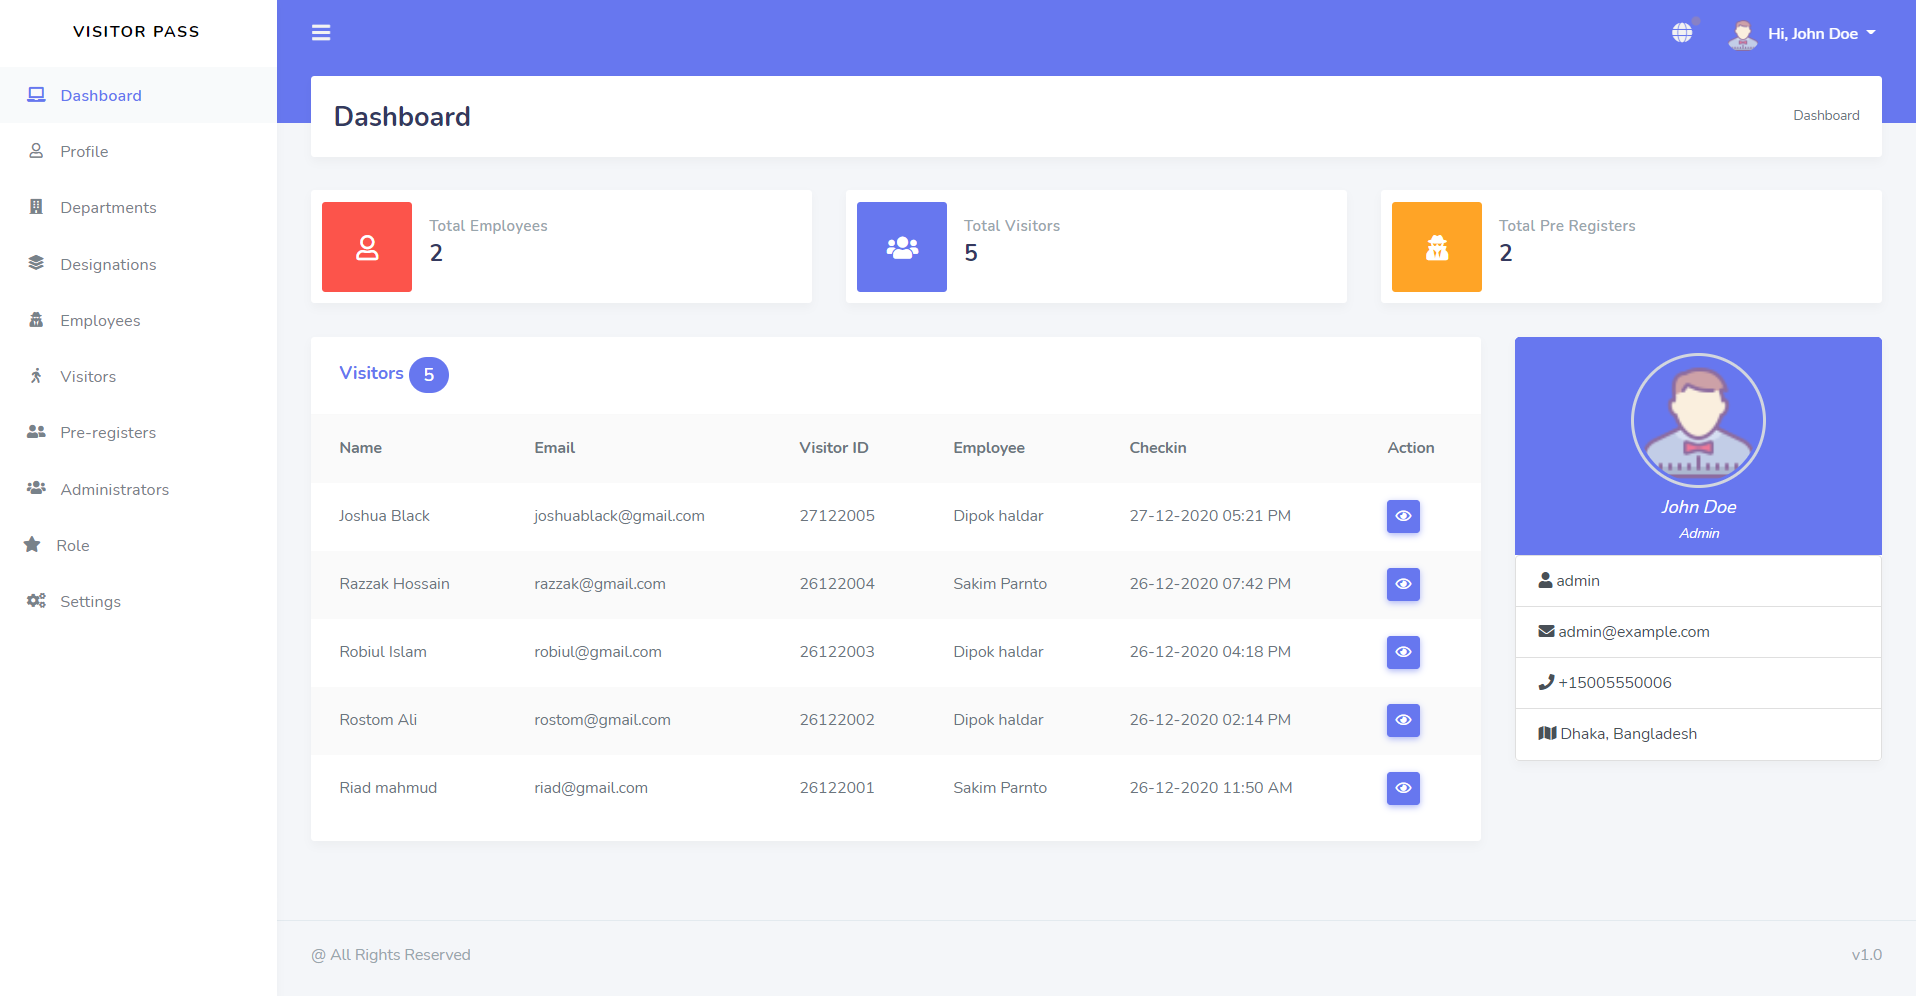
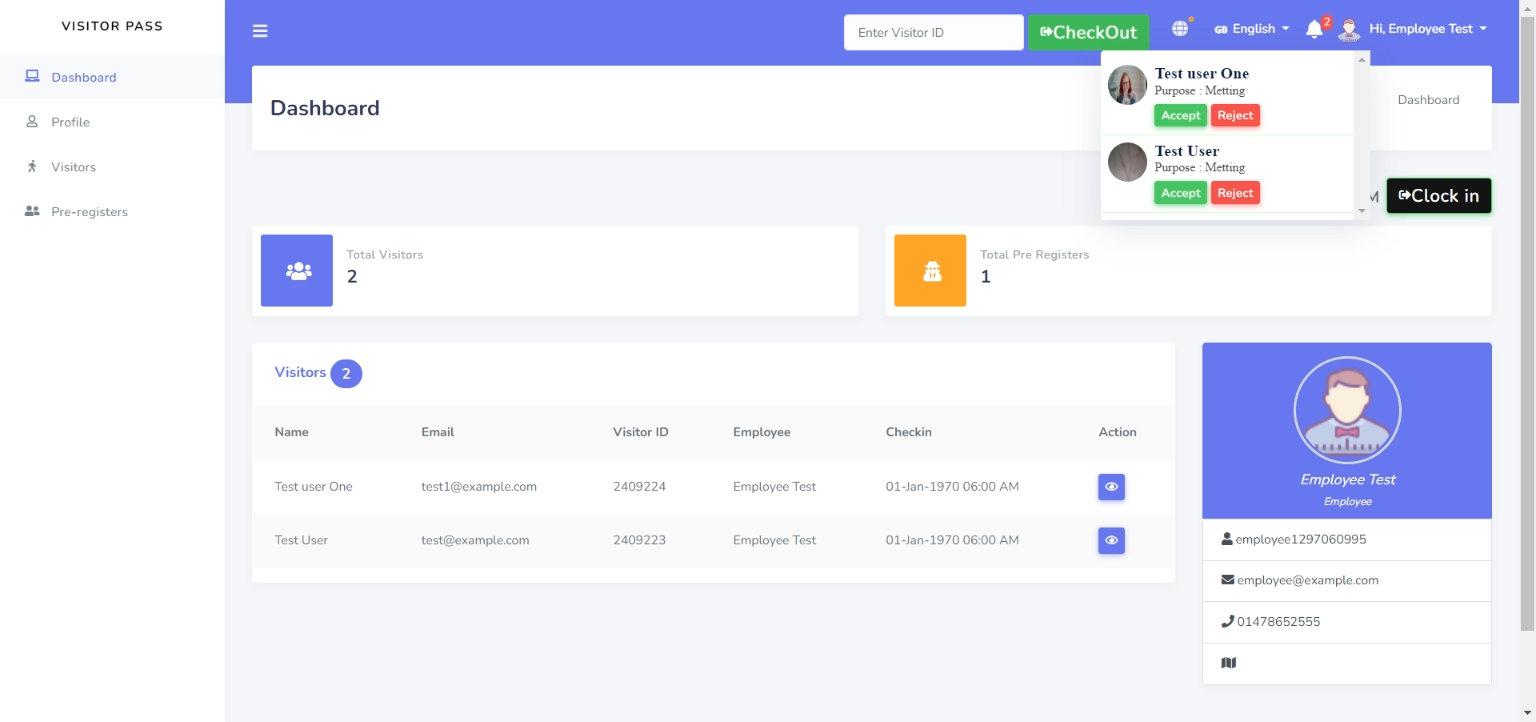
Employee Dashboard
Employees List and details

Employees details

Visitor List and details
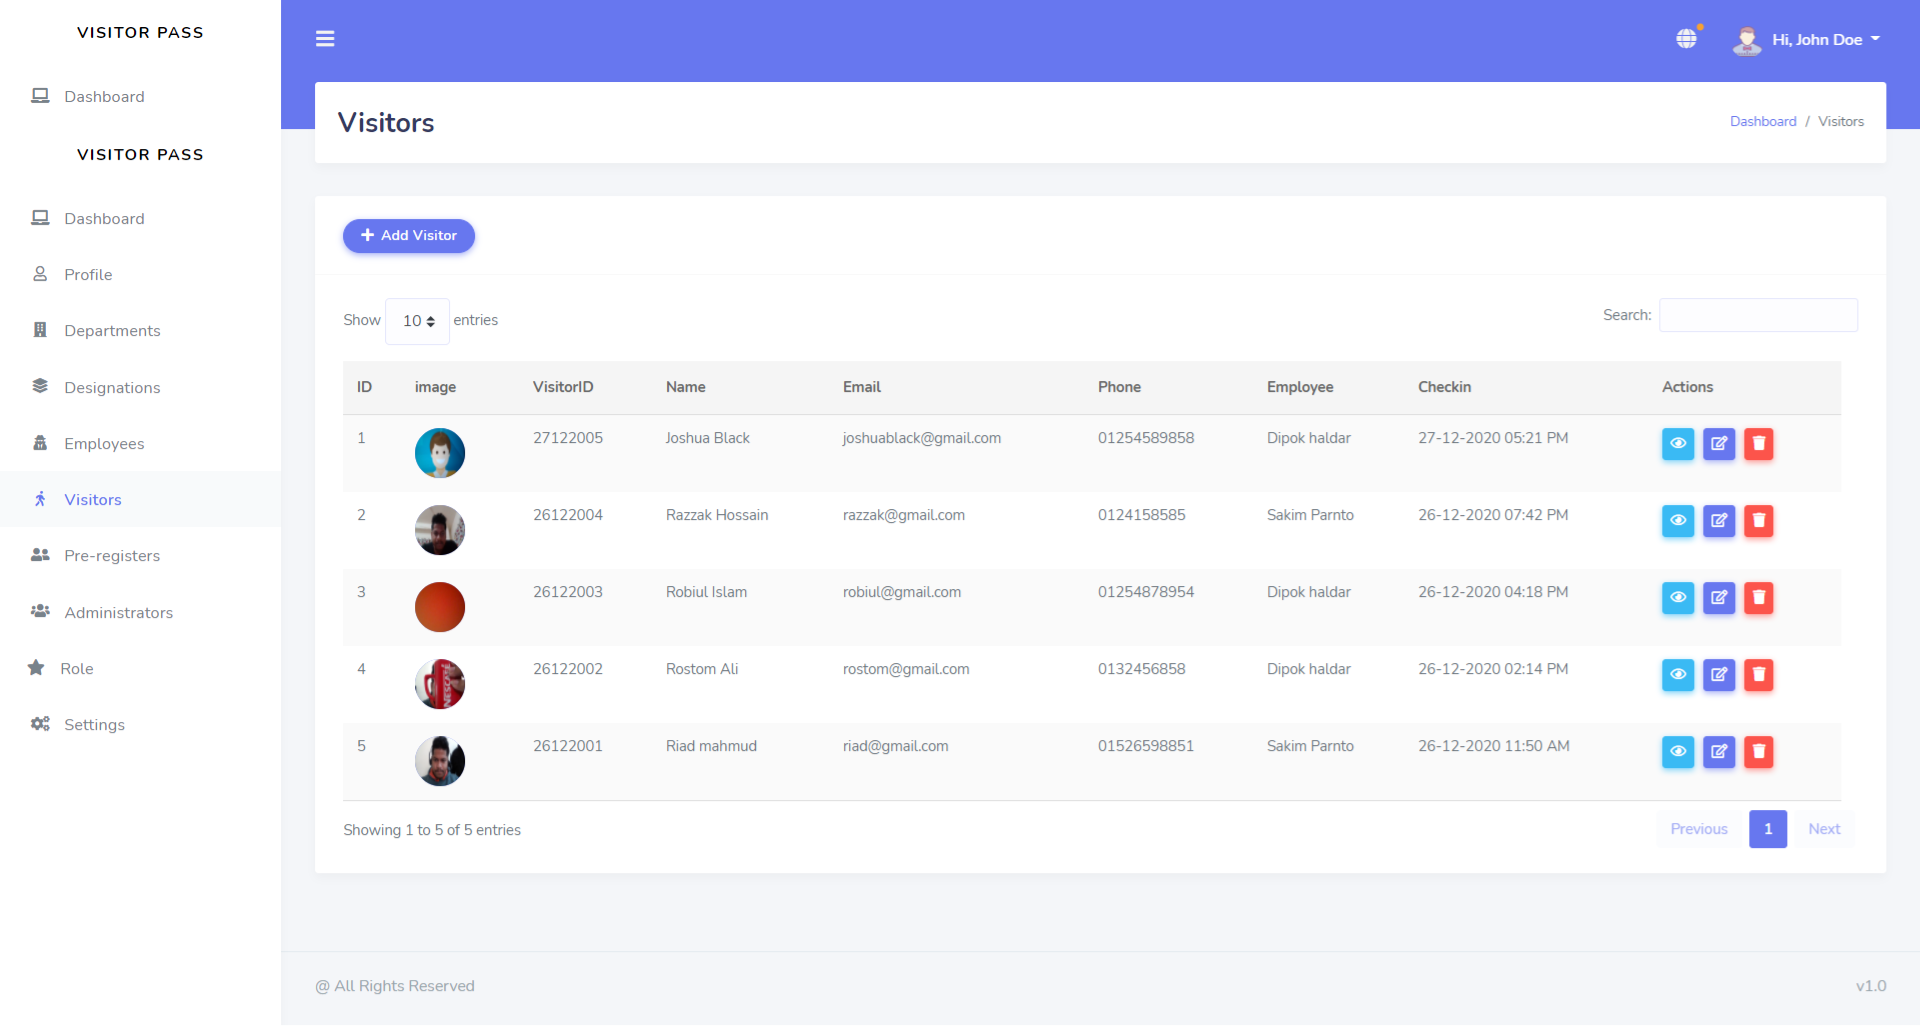
Visitor details

Pre-Register List and details

Attendance List

Attendance Add

Attendance Report

Visitor Report

Pre-register Report

General Setting
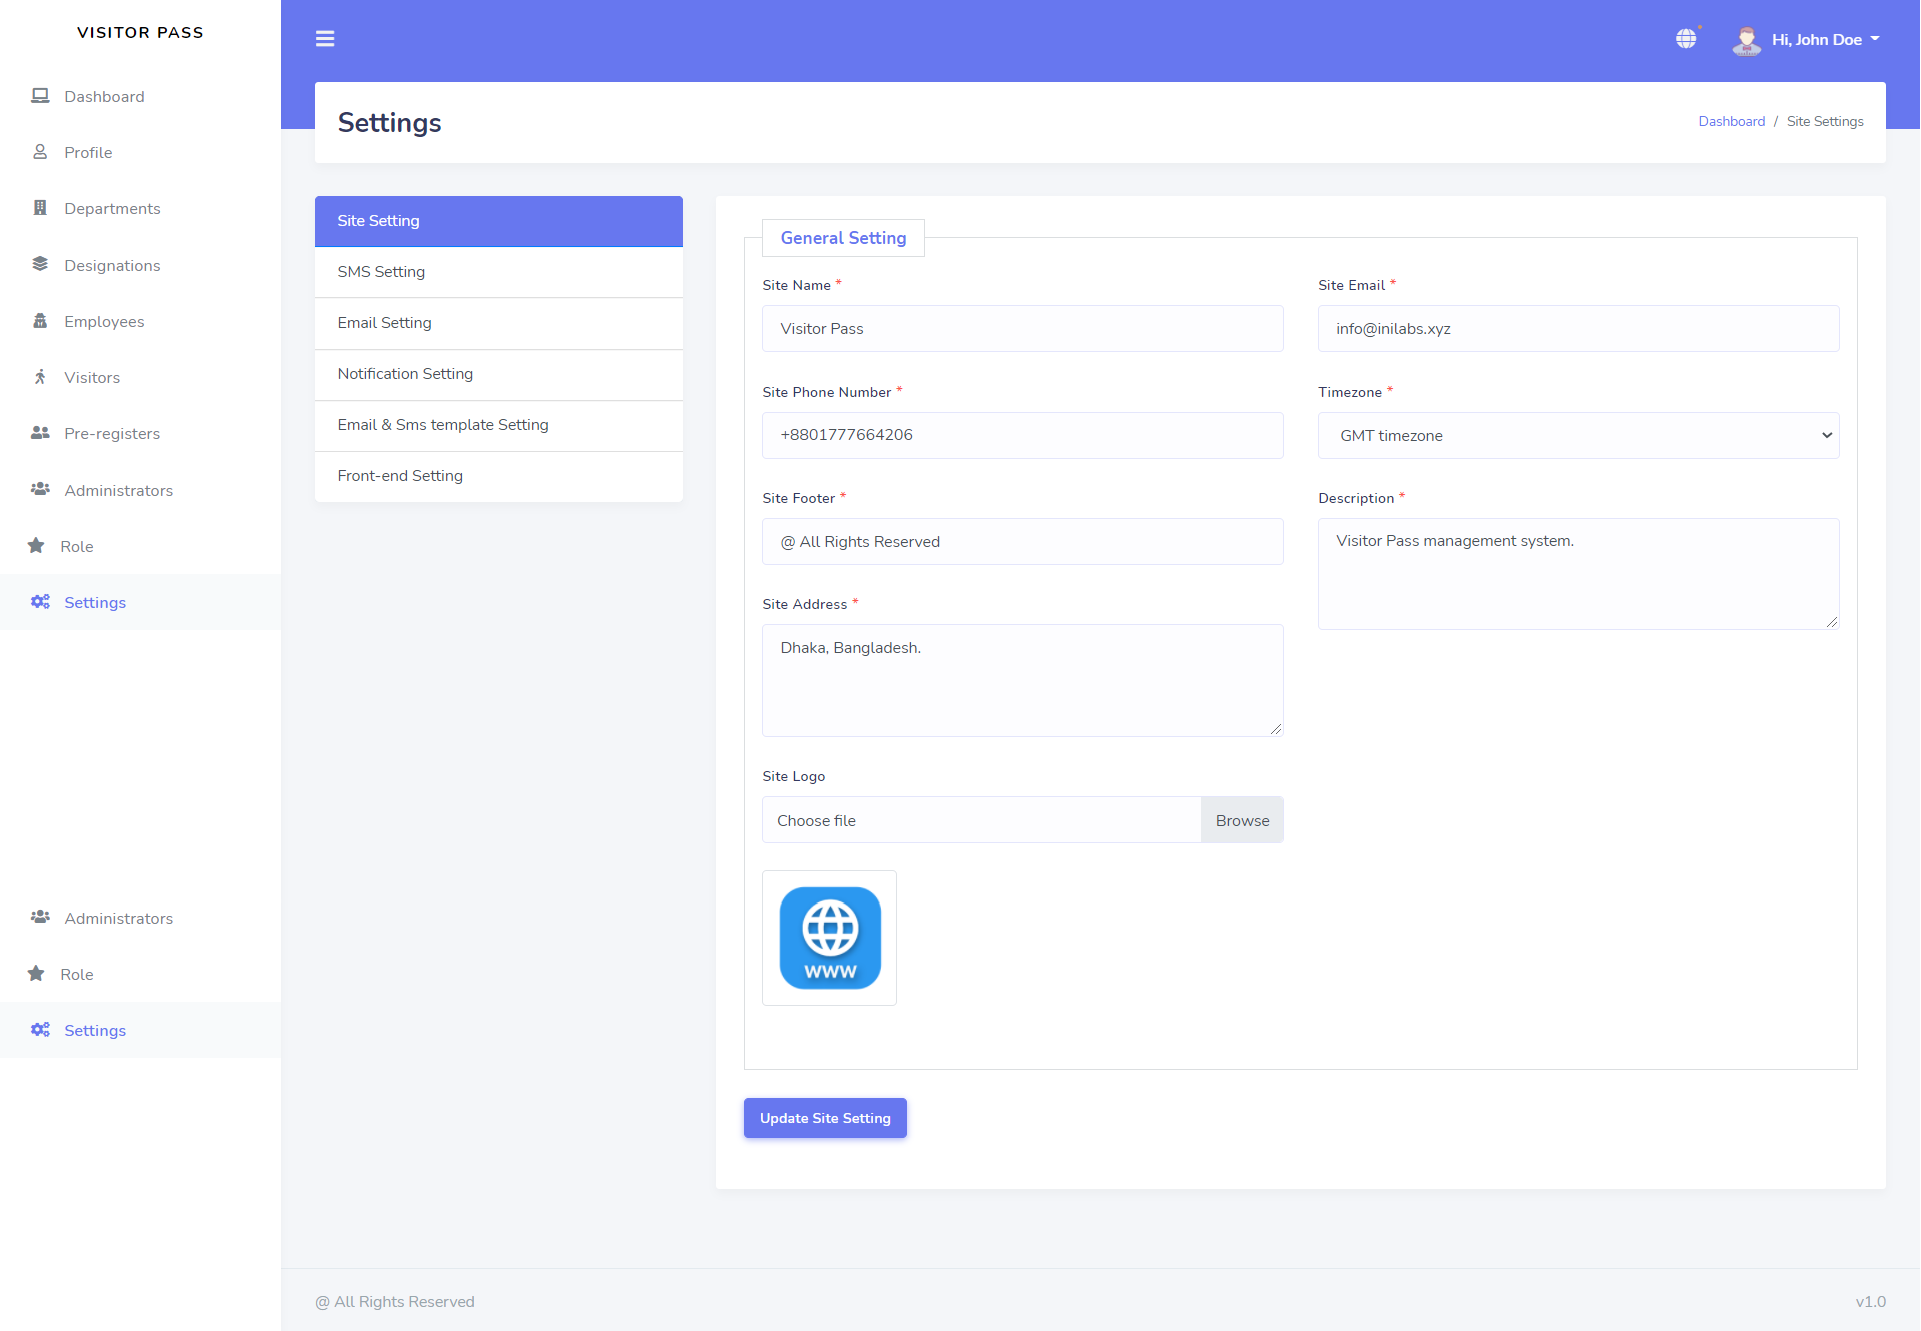
Notification Setting
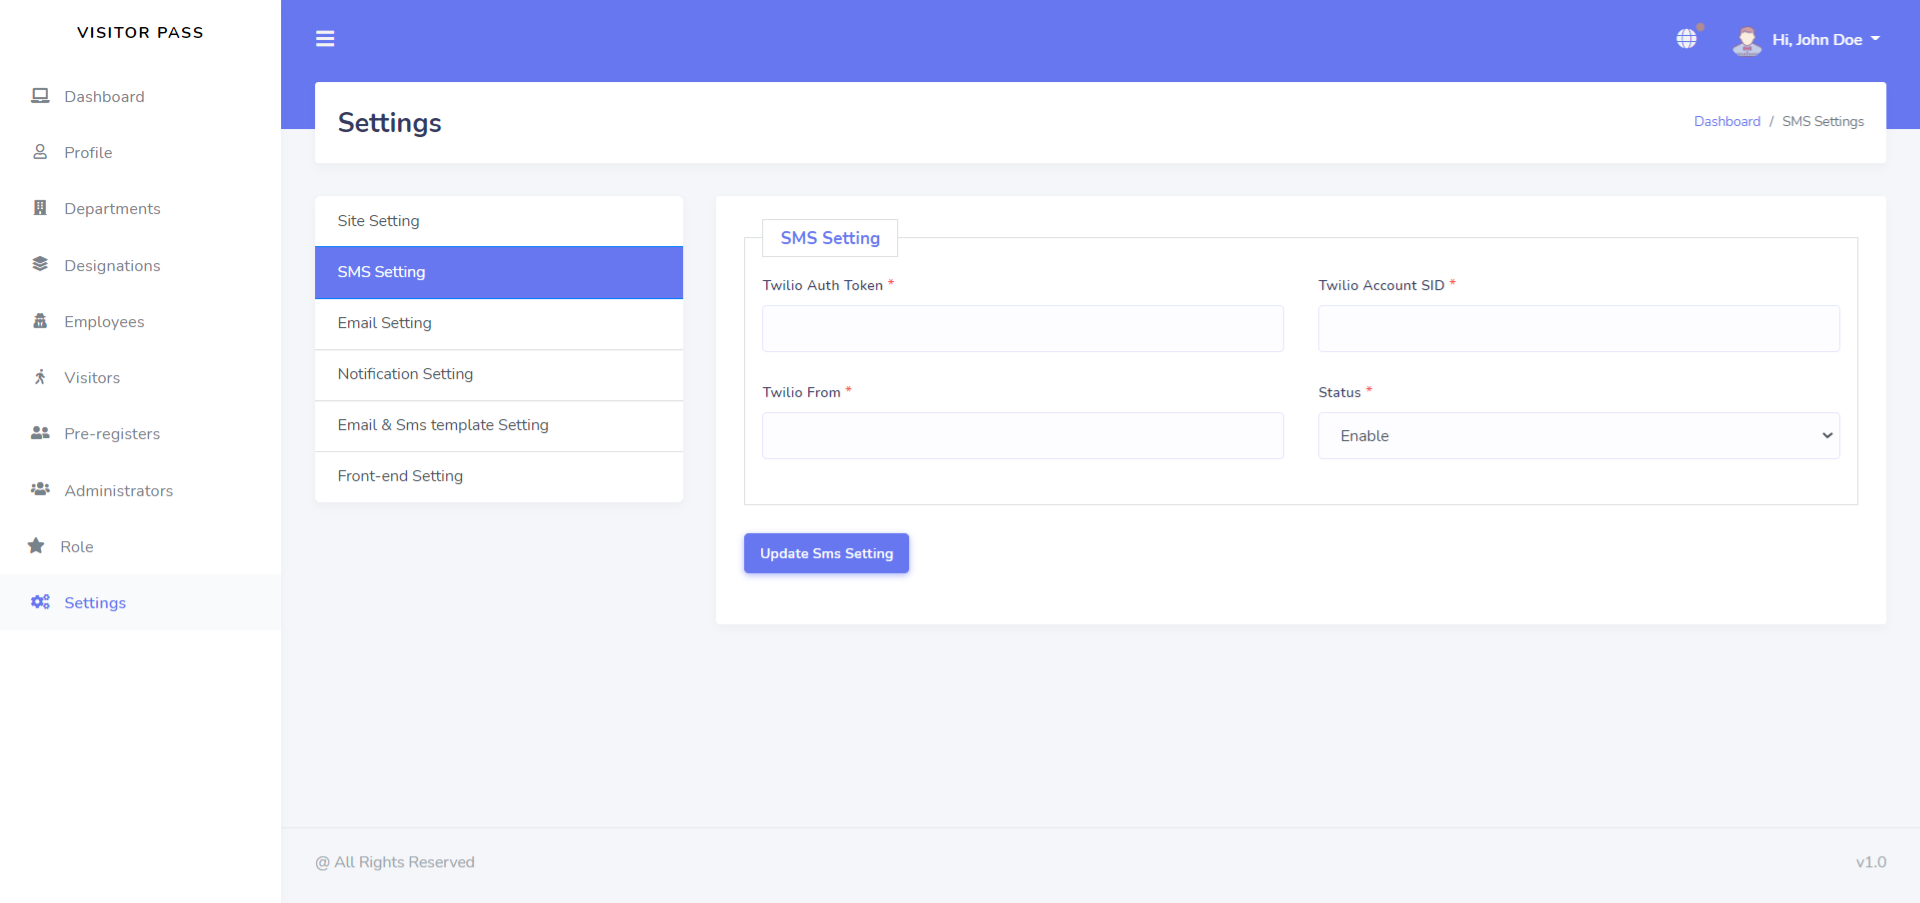
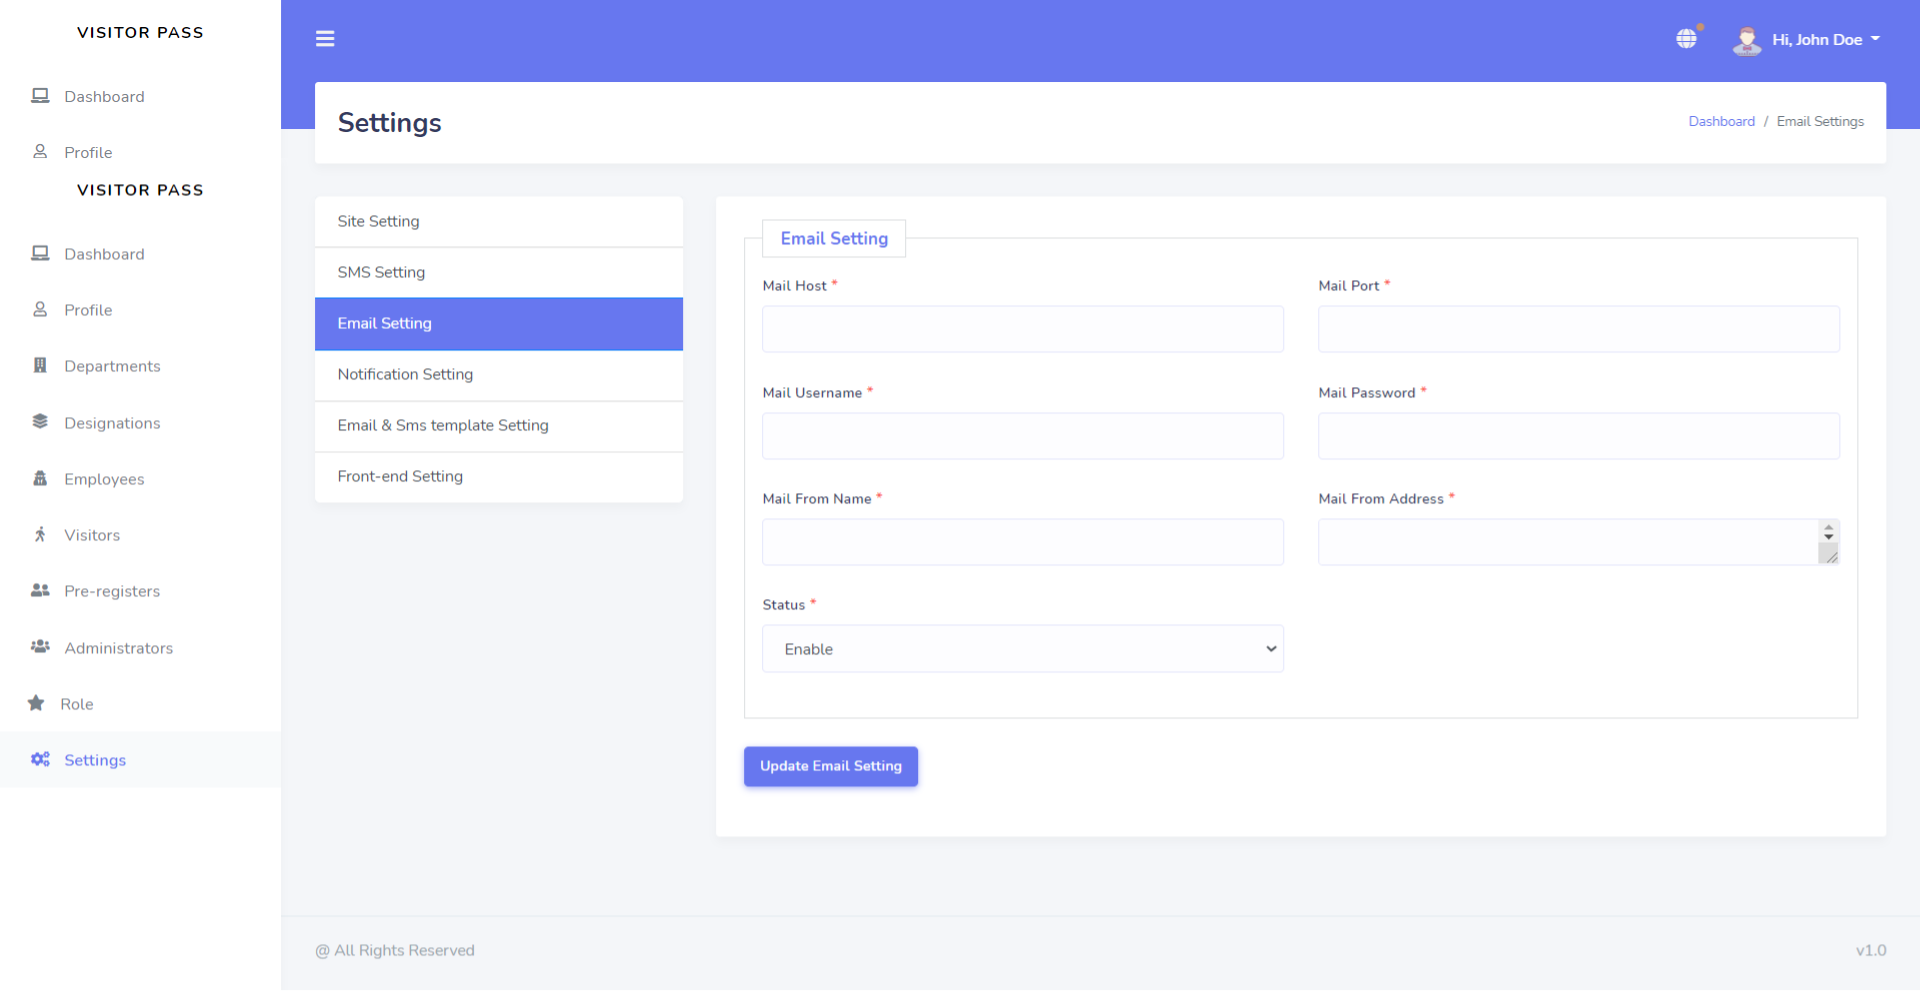
Email Setting
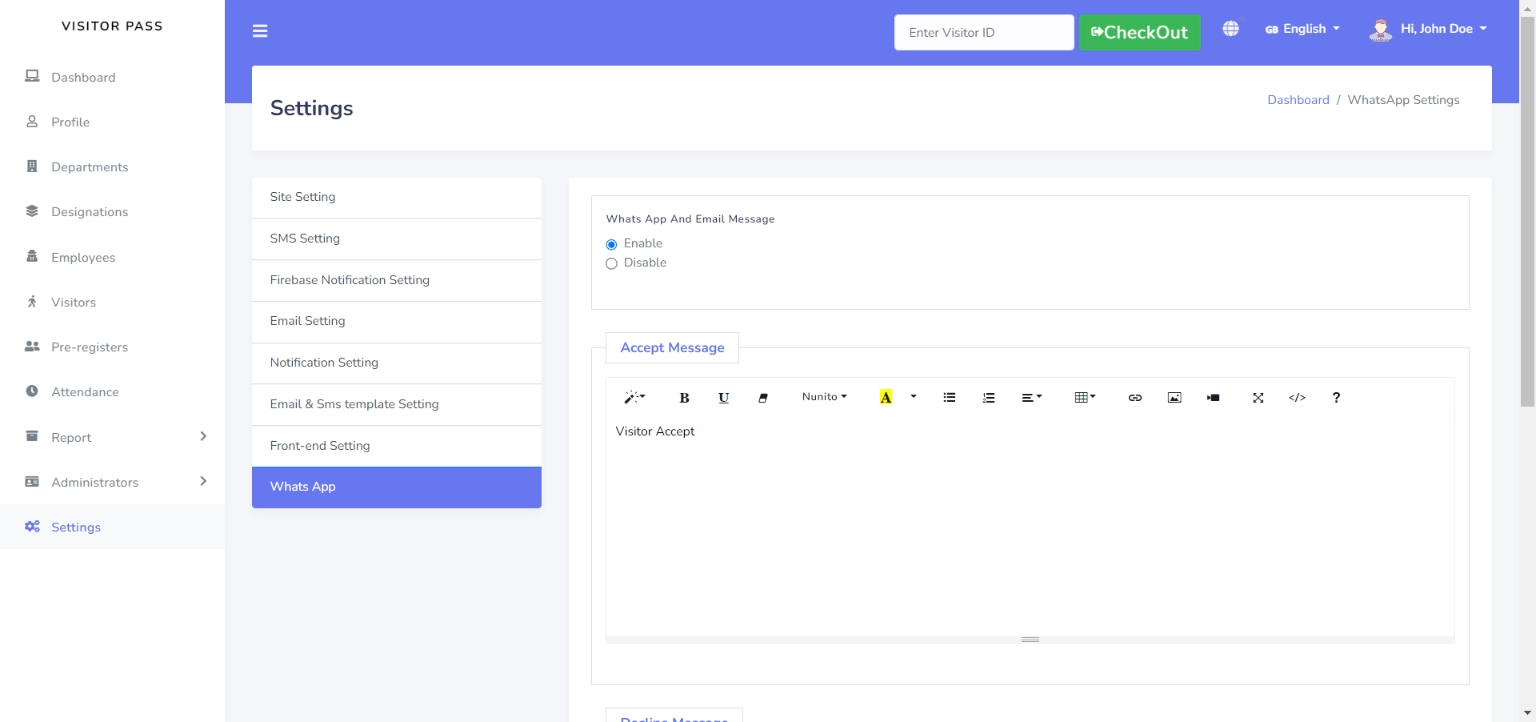
WhatsApp Setting
Front-end settings - enable/disable

FCM PushNotifications
Step 1: Create Firebase ProjectIn this step, We have to create a project on Firebase Console and then we have to create a web app on this project as you can see in these screenshots:

Step 2: Create a Web App in created Project

Step 3: Web App Configuration Detail

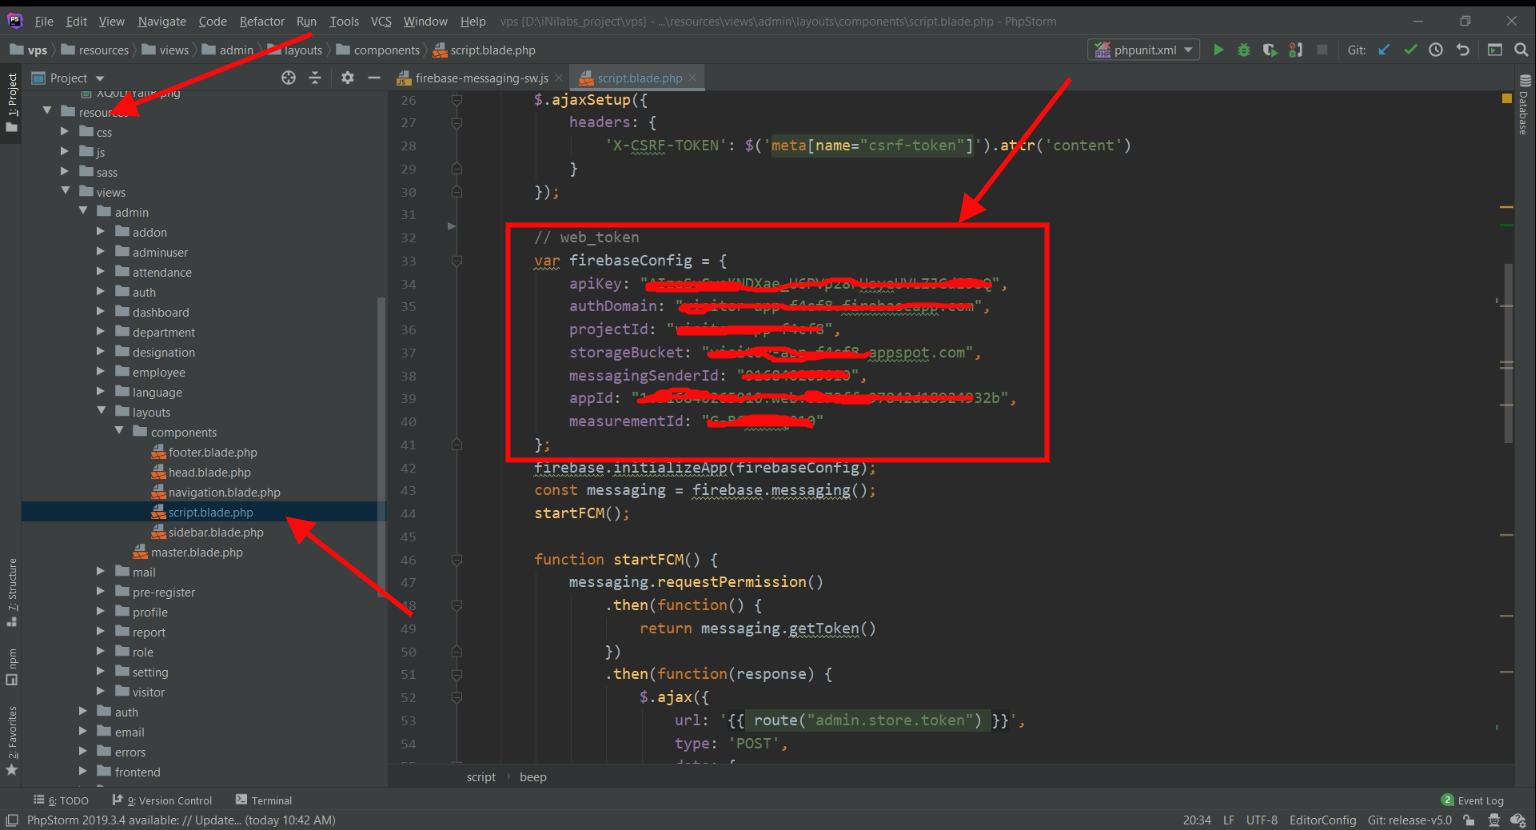
Step 4: Add Firebase Code
resources/views/admin/layouts/components/scripts.blade.php
Step 5: Create firebase-messaging-sw.js in a public folder

Step 6: To get server key click on Cloud Messaging option

Step 7: Turn on the switch and put the server key in your web .env file

SMTP
What is SMTP?Short for Simple Mail Transfer Protocol, a protocol for sending e-mail messages between servers. Most e-mail systems that send mail over the Internet use SMTP to send messages from one server to another; the messages can then be retrieved with an e-mail client using either POP or IMAP. In addition, SMTP is generally used to send messages from a mail client to a mail server. This is why you need to specify both the POP or IMAP server and the SMTP server when you configure your e-mail application.
In short it used to send emails to your site users..!! You can use any SMTP service provider.- Your own hosting SMTP server
- Gmail, Yahoo or some other email provider
Own SMTP Server
Using your own or some SMTP server Admin panel setup- Go to your Admin panel -> Setup -> General Settings -> Mail
- Set 'Mail driver', 'Mail host', 'Mail port', 'Mail encryption', 'Mail username' and 'Mail password'
- And save your changes.
/.env file setup
- Login to your FTP account.
- Open and Edit
/.envfile. - Copy and paste your server smtp details in the file.
MAIL_DRIVER=smtp
MAIL_HOST=your-mail-host
MAIL_PORT=your-mail-port
MAIL_USERNAME=your-mail-username
MAIL_PASSWORD=your-mail-password
MAIL_ENCRYPTION=your-mail-encryption
- Replace
your-mail-host,your-mail-port,your-mail-username,your-mail-passwordandyour-mail-encryption. - Save and Upload the file
- You are done.
/.env file settings override those of the admin panel.
SMS APIs
How to set up?
- Admin panel -> Setup -> General Settings -> Notification -> activate default SMS API, Set gateway information and save.
- You can use both Africa's Talking API or TWILIO as your SMS provider API:
TWILIO
TWILIO - https://www.twilio.com
Admin panel setup- Go to your Admin panel -> Setup -> Notification's Settings ->
- Set 'Twilio Account SID', 'Twilio Auth Token' and 'Twilio From'
- And save your changes.
TWILIO_ACCOUNT_SID=your-twilio-account-sid
TWILIO_AUTH_TOKEN=your-auth-token
TWILIO_FROM=your-sender-number
Others SMS Configurations
Now, go to your Admin panel :
- Admin panel -> Setup -> Notification Settings
You are done.
How To Contact Us?